INTRODUCTION
- Honeyd is an open ssource program which is already installed on Backtrack 5 distribution .
- Honeyd is created by Niels Provos .
- Do a google to fid Niels Provos and give special thanks for this wonderful program .
- Honeyd is used in the fields of information security
WHY WE USE HONEYD ?
- Honeyd is a used to set up and run multiple virtual hosts on a computer network.
- There are different type of honeypot solutions and why i use honeyd in this tutorial is because it is easy to deploy .
- Honeyd has the ability to mimic many different hosts at once .
- For example : Suppose in a network there is only 2 real servers and one server is running honeyd , then the network will appear running hundreds of servers to a hacker .And when hacker take more interest on these open servers , the hacker may get caught in the honeypot .Also through the analysis of logs security expert can analyse lots of information .
HOW TO OPEN HONEYD ON BACKTRACK 5
- To open honeyd > Goto BackTrack > Exploitation Tools > Social Engineering Tools > HoneyPots >honeyd
- See the below image for more help -
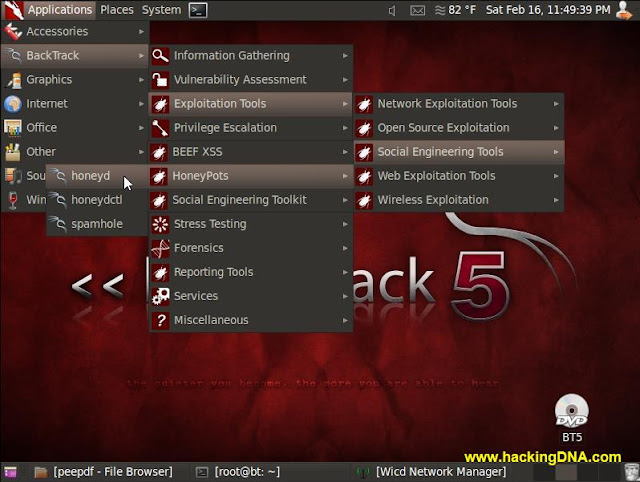 |
| HOW TO OPEN HONEY ON BACKTRACK 5 |
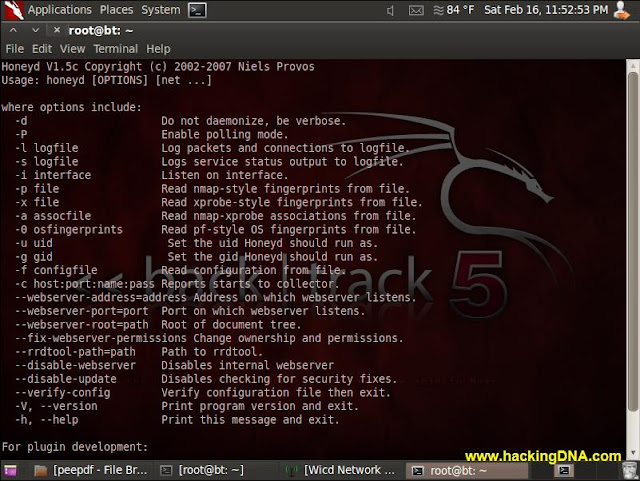 |
| HONEYD STARTED |
.
CREATING HONEYD CONFIG FILE
CREATING HONEYD CONFIG FILE
- In this step you have to create a honeyd.conf file .
- To create a text file we use gedit
- Enter the following command as shown below -
 |
| OPEN HONEYD.CONF WITH GEDIT ON BACKTRACK 5 GNOME |
EDIT honeyd.conf FILE WITH GEDIT
- Inside the honeyd config file , we creating the windows template .
- You can create many number of templates inside honeyd.conf file .
- In windows template we are defining number of things , such as
- First we are setting the personality, meaning when another device on the network connects to this honeypot it will appear to be a Windows XP Pro SP1 .
- In the windows template I’m also opening up three ports (23, 25, and 80). These are the ports that are opened on a windows machine . The “set windows ethernet” sets a MAC address for our honeypot.
NOTE : You can make MAC address of any type like as shown in our example : aa:bb:cc:dd:ee:ff
4. Finally at the end we bind the ip address of our honeypot as 192.168.85.126 .
5. And if you want to acquire ip address from dhcp then you have to enter this line instead of the last line shown in the below image .
For acquire ip from dhcp use this line : dhcp windows on eth0
 |
| CONFIGURING HONEYD.CONF FILE |
LAUNCHING HONEYPOT
- To launch honeyd , simply enter the following command .
- Command Used : honeyd -d -f honeyd.conf
- Here we use -d option so it doesen't run on the background as a deamon .
- See the below image what output it shows for more help -
 |
| LAUNCHING HONEYD |
EXAMPLE 1
ON WINDOWS XP MACHINE
- From windows XP which has a ip address 192.168.85.133 .
- From Windows XP , when we ping the honeyd ip address 192.168.85.126 , it successfully ping , it means our honeyd is working .
- See the below image for more details -
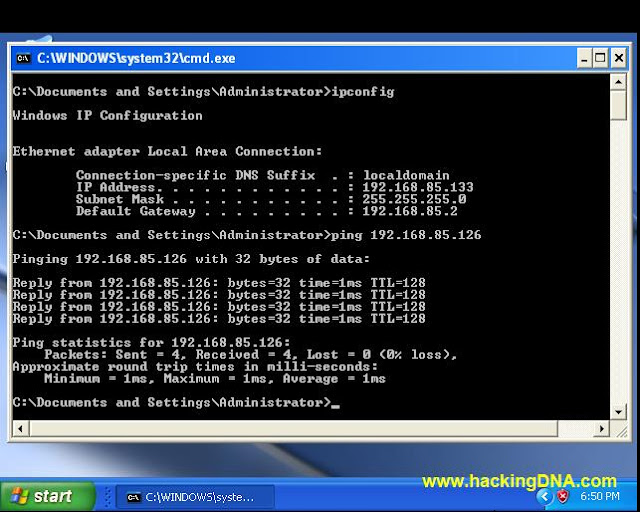 |
| PING THE HONEYD IP FROM WINDOWS XP |
ON BACKTRACK 5 MACHINE
- Here you can see the result on honeyd , it shows that sending of ICMP Echo Reply back to windows xp from honeyd .
- See the below image for more details -
 |
| ICMP ECHO REPLY (HONEYD) |
EXAMPLE 2
XPROBE 2
ON BACKTRACK 6 MACHINE
- Now on backtrack 4 machine we use the xprobe2 to fingerprint the honeyd.
- See the below image for more help -
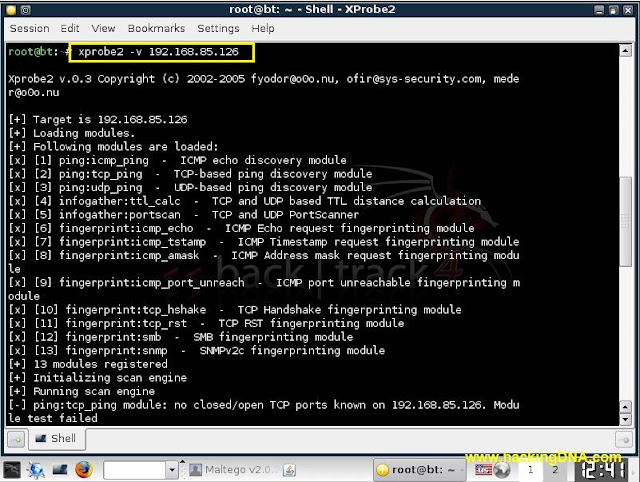 |
| XPROBE2 ON BACKTRACK4 |
BACKTRACK 5 MACHINE
- It shows the result on the honeyd , see the below image for more details .
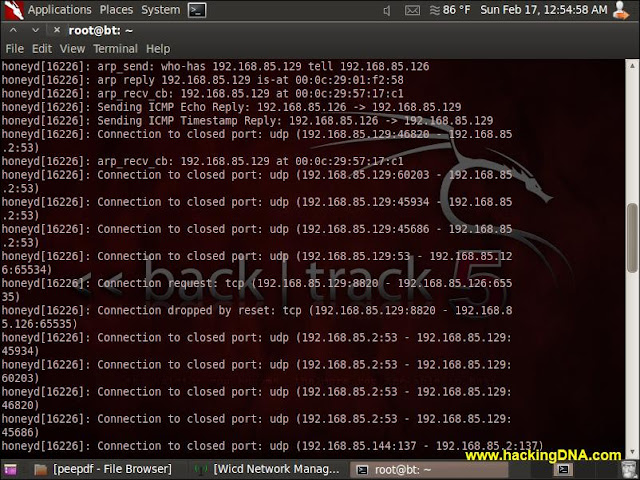 |
| XPROBE RESULT ON HONEYD |
SAVE IN OUTPUT FILE
- You can also save the results in the log file using -l filename options .
THINGS TO REMEMBER
- You can use different other editor in backtrack like gedit , vim and nano .
- In this tutorial we use backtrack 5 gnome .
- In KDE , you have to use VIM or Nano editor instead of gedit . Why because gedit is not installed on backtrack 5 KDE .
- Soon more example will be added and for more frequently ask questions you can go through with this page : http://www.honeyd.org/faq.php
THIS TUTORIAL IS JUST FOR EDUCATIONAL PURPOSE ONLY /-
0 nhận xét:
Đăng nhận xét